
How to Make Trimless Channel Letters
Trimless channel letters have no aluminum or plastic trim cap on the face. The acrylic face sits flush against the return, so there is no visible trim seam. The result is a cleaner, more modern letter, and one that is faster and cheaper to produce once you have the right equipment.
This guide covers the full fabrication process: what makes trimless letters different, the components involved, how the Ascent extrusion system works, and the step-by-step assembly sequence.
What Makes Trimless Letters Different
In a conventional channel letter, the aluminum or plastic trim cap wraps around the perimeter of the face, covering the joint between the face and the return. Trim cap exists to hide that joint — it is a cosmetic cover for an imprecise connection.
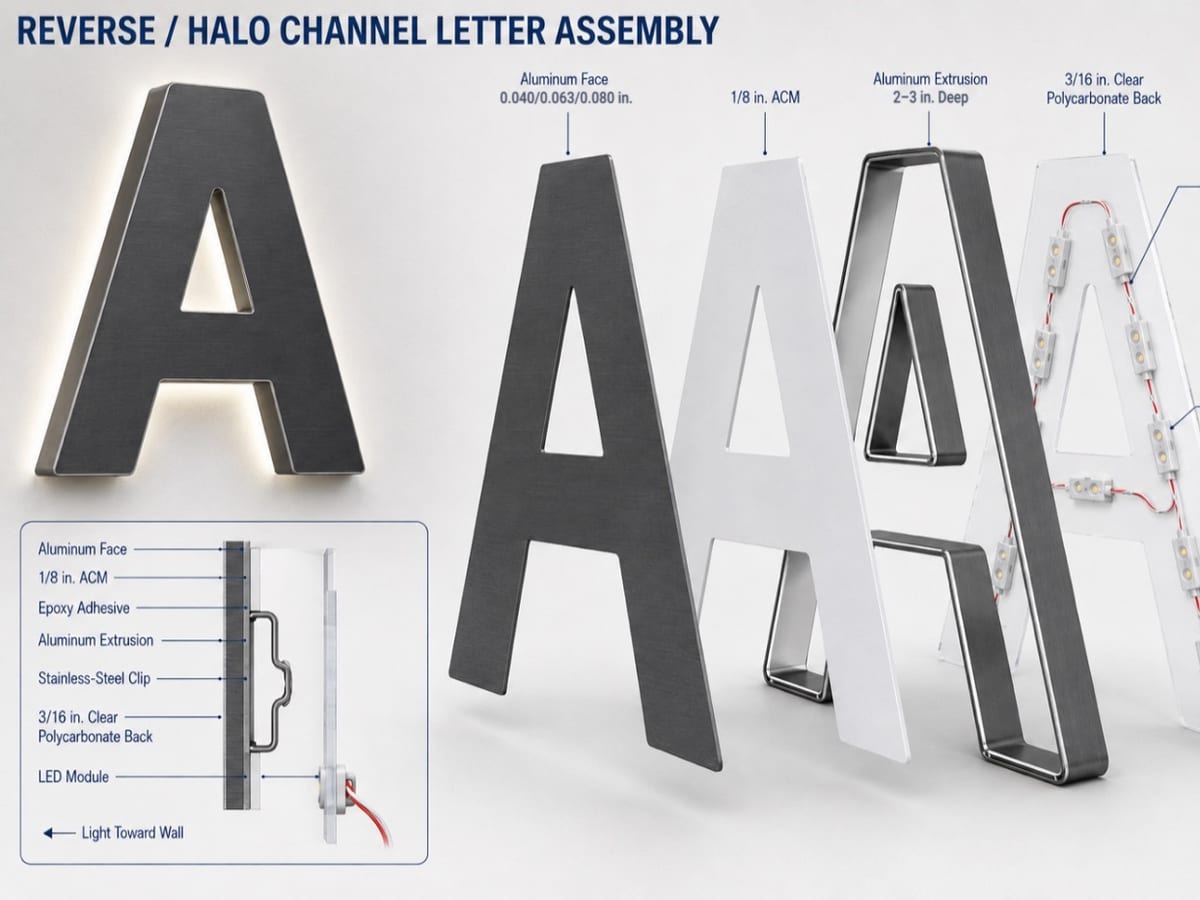
Trimless letters eliminate the trim cap by building the connection directly into the return profile. The Ascent aluminum extrusion has built-in features for the face. A clear polycarbonate layer is pinned to the extrusion with tiny 6 mm stainless-steel pins, and the acrylic face is glued on with optically clear glue. That holds the face flush and square without welding or trim cap. The letter looks cleaner because there is nothing to hide.
From a production standpoint, eliminating the trim cap step removes a significant amount of hand labor from every letter — cutting trim cap to length, fitting corners, gluing or stapling, finishing the joints. At volume, this adds up quickly.
Components of a Trimless Channel Letter
Ascent aluminum extrusion profiles: The return material. Unlike flat aluminum coil, the Ascent profiles are pre-formed with built-in features on the face edge that hold the face assembly. The profiles come in four sizes, 1.37, 2, 3, and 4 inches, and they are primed white with epoxy. These are what make trimless production possible — standard flat coil cannot produce a trimless letter because there is nothing to hold the face.
Face material: Acrylic (typically 3mm), cut to the letter outline and glued on with optically clear glue. A clear polycarbonate layer behind the acrylic reinforces the face. It is pinned to the extrusion with tiny 6 mm stainless-steel pins. Color and translucency are chosen based on the client's brand requirements.
Back panel: ACM (aluminum composite material), cut to the letter outline. The back closes the letter and provides the mounting surface for the power supply and wiring.
Stainless steel clips: Connect the back panel to the return without welding. The 8 mm clips hold the back on the return, and the back can come off again for wiring or service.
LEDs: Mounted inside the return on the back of the face or on the inner face of the back panel, facing inward. Standard module-on-strip configurations work well; the extrusion depth determines how much room you have for the LED run and driver.
Pneumatic gun: Comes with the bender. It drives the tiny 6 mm stainless-steel pins that close the return joints and pin the polycarbonate layer to the extrusion, quickly and consistently. Together with the clips, it replaces the welding step entirely, and it can be operated by one qualified person following the required training, process controls, and safety procedures.
The Role of the Ascent Bending Machine
Standard bending machines process flat aluminum coil. They cannot bend Ascent extrusion profiles, because the profiles have a more complex cross-section than flat coil — the face-edge features require a different set of tooling and a different bending process.
The Ascent 4AS and 5AS are purpose-built to handle both flat aluminum coil and Ascent extrusion profiles. When you load the extrusion, the machine reads your letter file, cuts the profile to the correct notch depth and spacing, and bends it around the letter path — including tight curves and small radii — without distorting the profile.
The 5AS additionally processes F-trim profiles, which are a wider-flanged version of the extrusion used on certain letter styles. If your shop produces F-trim letters alongside trimless, the 5AS is the right machine.
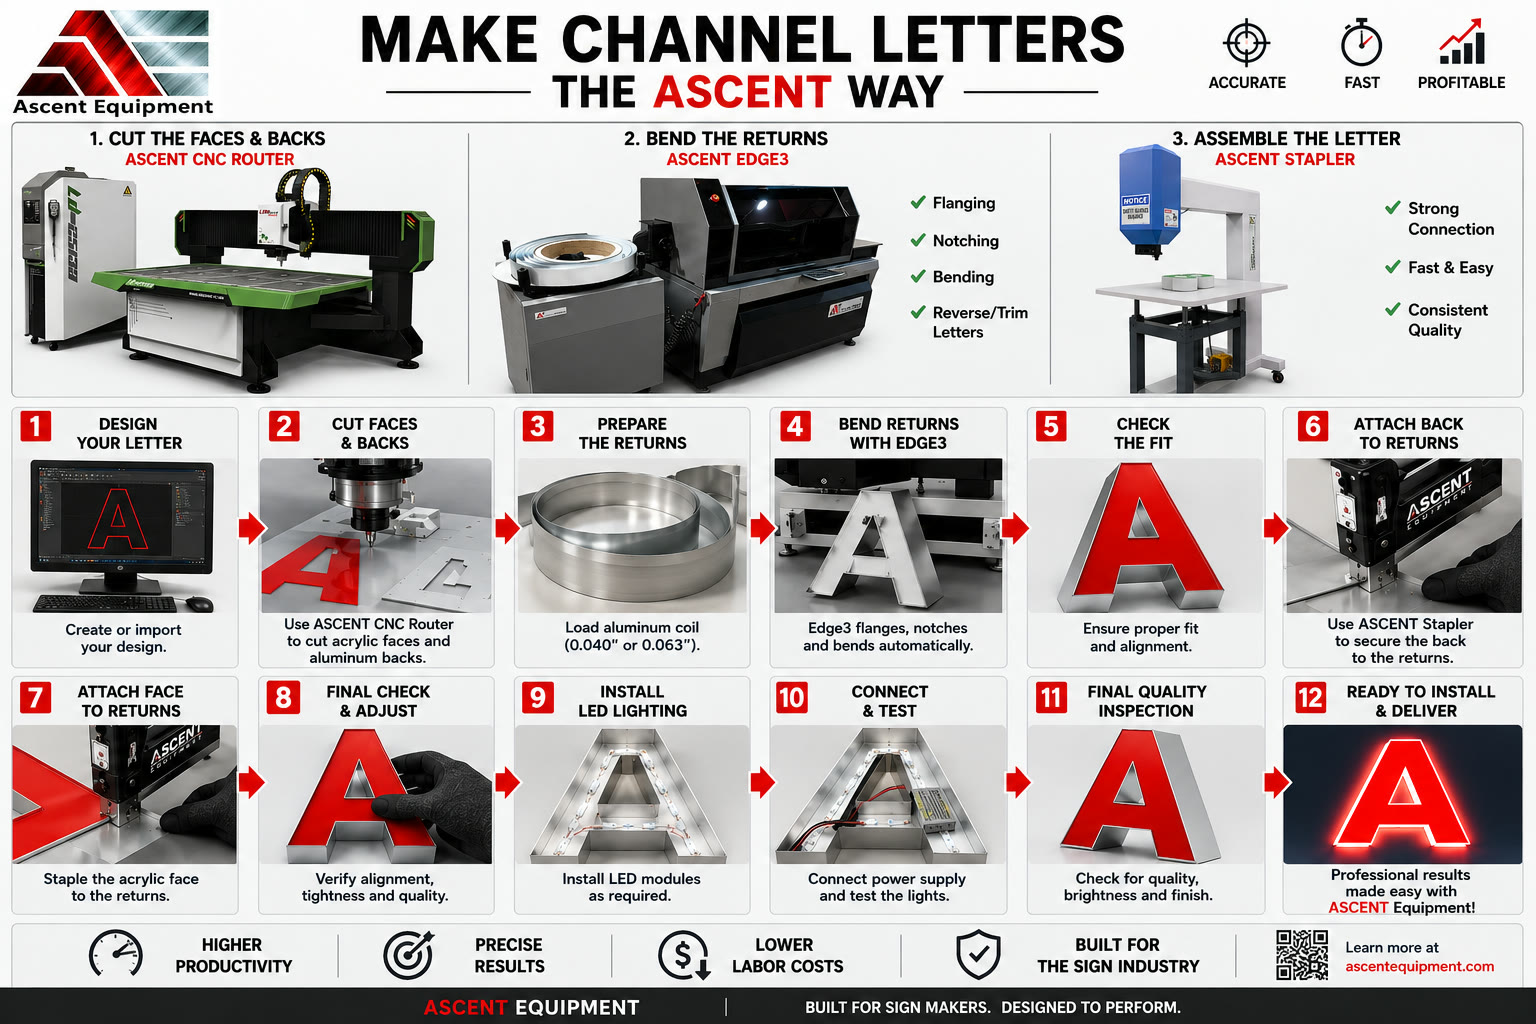
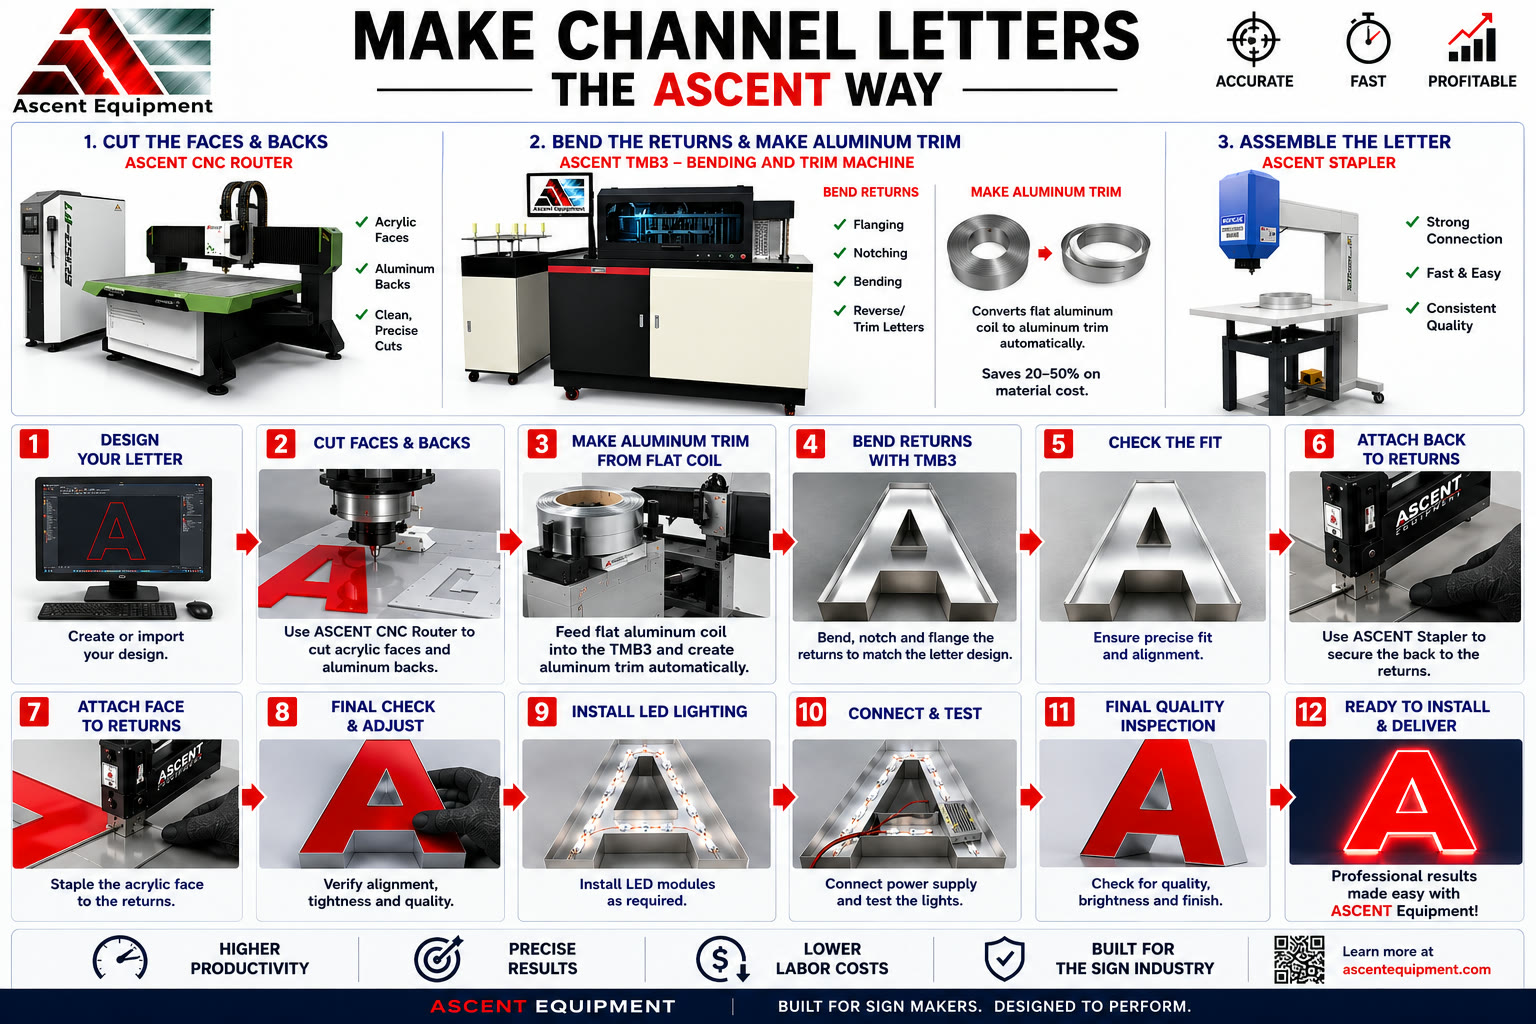
Step-by-Step: Fabricating a Trimless Channel Letter
Step 1 — Prepare the file
Load your letter artwork (DXF or AI) into the bending machine software. The software calculates the notch positions and extrusion length automatically based on the letter path. No manual reprogramming is required when switching between file formats.
Check the depth specification. Ascent extrusion profiles are available in standard depths; confirm that your specified depth is compatible with the face thickness and LED assembly you're planning.
Step 2 — Cut and bend the return
Feed the Ascent extrusion profile into the bending machine. The machine cuts notches at the correct intervals, then bends the profile around the letter path. For sharp internal corners (like the inner angles of an A or E), the machine produces a precise notch that allows a clean bend without cracking or deforming the profile.
When the return is complete, it will be a continuous formed loop matching the letter outline, with the face-holding features running along the entire front edge.
Step 3 — Cut the face and back panels
Cut the acrylic face and the clear polycarbonate layer to the letter outline using a CNC router or laser cutter. They should match the return outline exactly, because the face sits flush against it, so tolerance here matters. A CO₂ laser cutter produces clean, sealed edges on acrylic.
Cut the back panel to the same outline.
Step 4 — Install the LEDs
Before closing the letter, mount the LED strip inside the return. Run the strip around the inner perimeter, keeping consistent spacing and ensuring coverage on curves and corners. Connect to the driver and test at this stage — it is significantly easier to fix wiring issues before the face and back are installed.
Route the power wire through a pre-drilled hole in the back panel.
Step 5 — Pin the polycarbonate and glue on the face
Pin the clear polycarbonate layer to the front edge of the return with the pneumatic gun and the 6 mm pins. Then glue the acrylic face on with optically clear glue, and let the glue cure as its instructions say. On a well-formed letter, the result is a flush, clean joint with no trim cap and no visible seam.
On letters with tight curves or small internal radii, work around the curve gradually, one section at a time.
Step 6 — Install the back panel
Position the back panel against the rear edge of the return and fit the stainless steel clips. The clips pull the back tight against the return and hold it there, and the back can come off again if the letter ever needs service.
This replaces the TIG welding step entirely. No heat, no warping, no skilled welder required.
Step 7 — Install the power supply
Mount the LED driver inside the letter (if depth allows) or in a raceway. Confirm all connections are secure and the driver is rated correctly for the total LED load. Run the power wire through the back panel hole and seal with a grommet.
Step 8 — Final test and mount
Test the assembled letter before it leaves the shop. Check for even illumination, no dead LEDs, and clean face seating around the full perimeter. Mount to the wall using direct-mount standoffs or on a raceway, depending on the installation design.
Common Questions About Trimless Letters
Can I produce trimless letters with my existing bending machine? Only if it is specifically designed to process Ascent extrusion profiles. Standard bending machines process flat aluminum coil and cannot handle the extrusion cross-section or produce the correct notch geometry for a trimless letter.
Is the face more fragile without trim cap holding it in? No. The polycarbonate layer is pinned to the extrusion and the acrylic is glued to it, so the holding force is spread evenly around the perimeter. The face does not flex or rattle in normal use.
What letter sizes work with trimless construction? From small interior letters (3") up to large exterior letters. The extrusion comes in 1.37, 2, 3, and 4 inch depths, and the Ascent system is a UL/RU Recognized Component for indoor and outdoor letters up to 66 inches. Letters deeper than the extrusion range generally use conventional construction.
How does cost compare to conventional letters? Material cost is slightly higher because Ascent extrusion profiles cost more per linear foot than flat aluminum coil. Labor cost is lower — significantly lower — because the trim cap step is eliminated. Most shops find that trimless letters have a higher sell price, lower labor cost, and better margin than conventional letters once they reach production rhythm.
Why Trimless Letters Are Worth Offering
Sign shops that add trimless letter capability consistently find that it opens work they were previously losing to competitors — hospitality interiors, retail chain rollouts, architectural signage — where the no-trim aesthetic is either specified or preferred. The letters also install faster, because there is no trim cap to damage in transit or touch up on site.
The Ascent 4AS is the entry point. If you're already producing reverse halo letters without welding, you're one profile swap away from trimless production on the same machine. If you're evaluating equipment for the first time, contact us and we'll walk through a production scenario based on your current letter mix and volume.