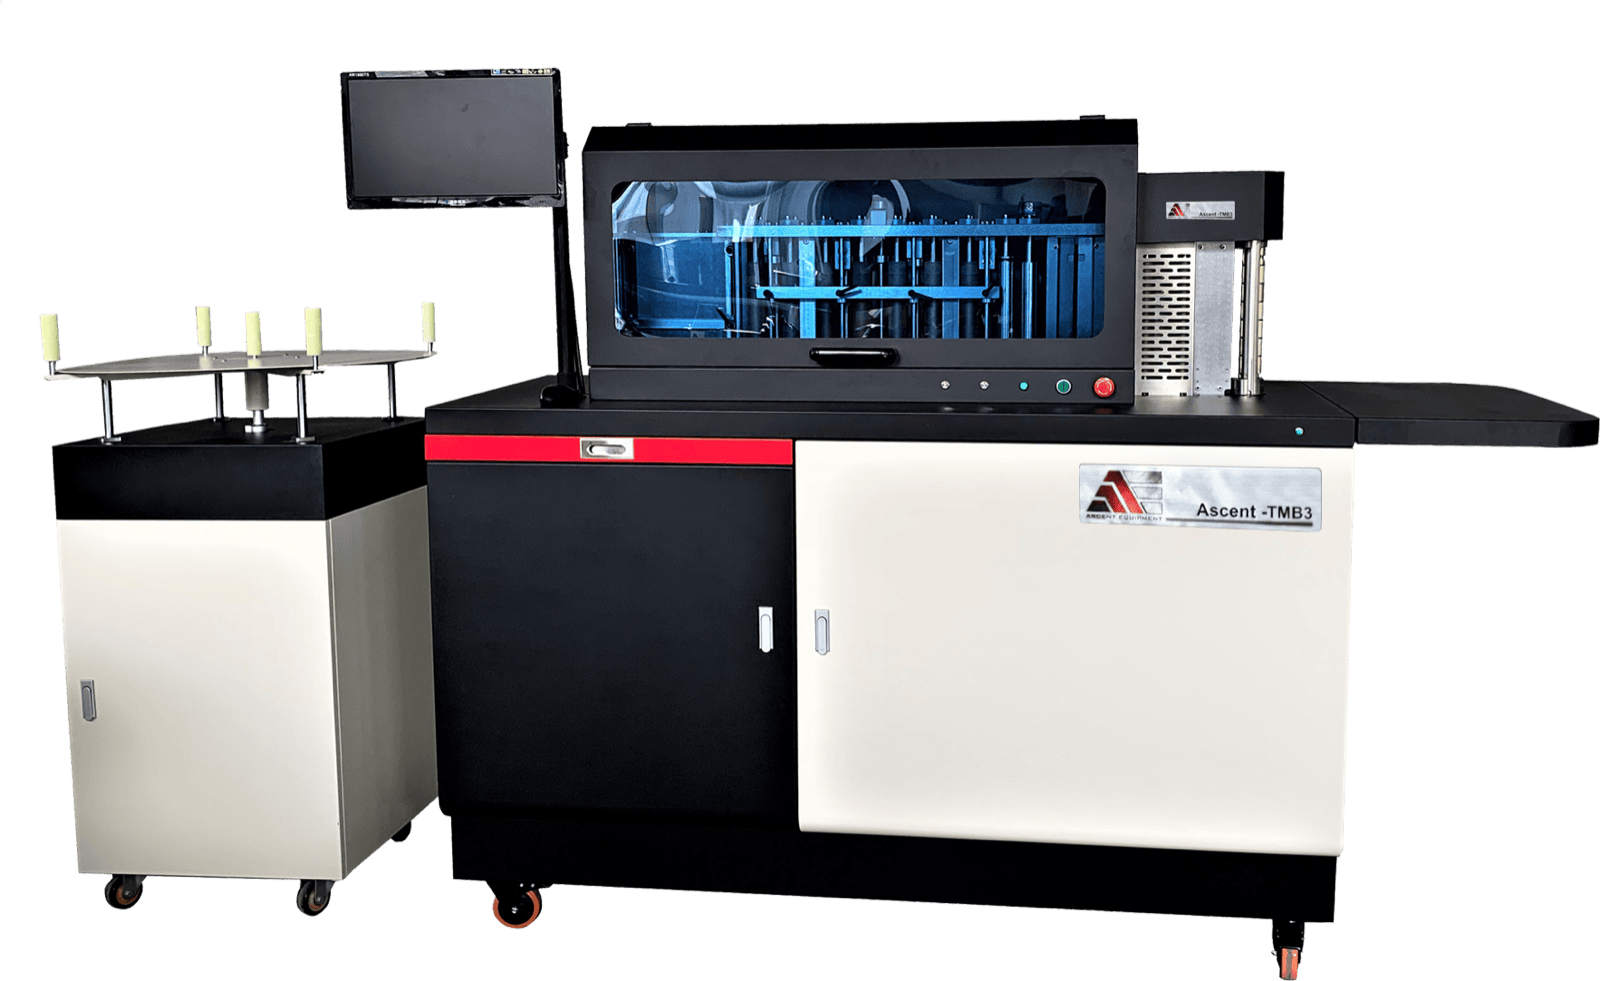

Based on Ascent Equipment's review of publicly available North American machines as of August 2026, we have not identified another machine offering this same combination of capabilities. The Ascent TMB-3 does two jobs at once: it bends the aluminum return and converts flat aluminum coil directly into aluminum trim cap — automatically, in the same workflow. That changes how you plan material, how much you spend per letter, and how long assembly takes.
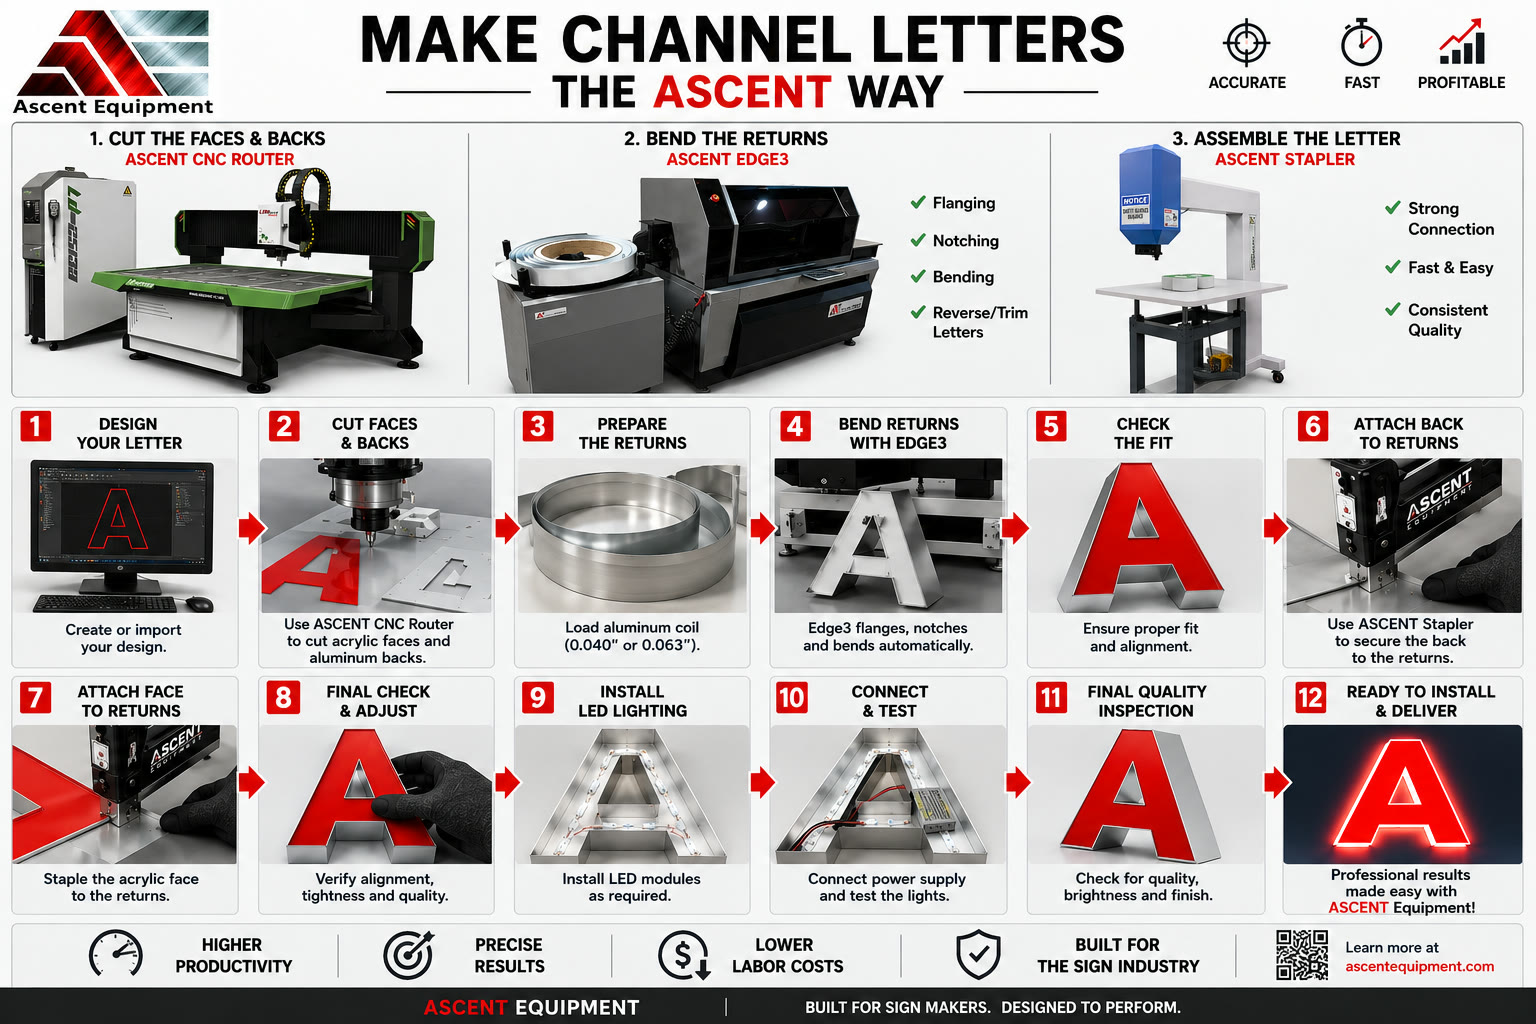
This walkthrough covers the complete channel letter production process using three Ascent machines: the CNC Router, the Ascent TMB-3 Bending and Trim Machine, and the Ascent Stapler.
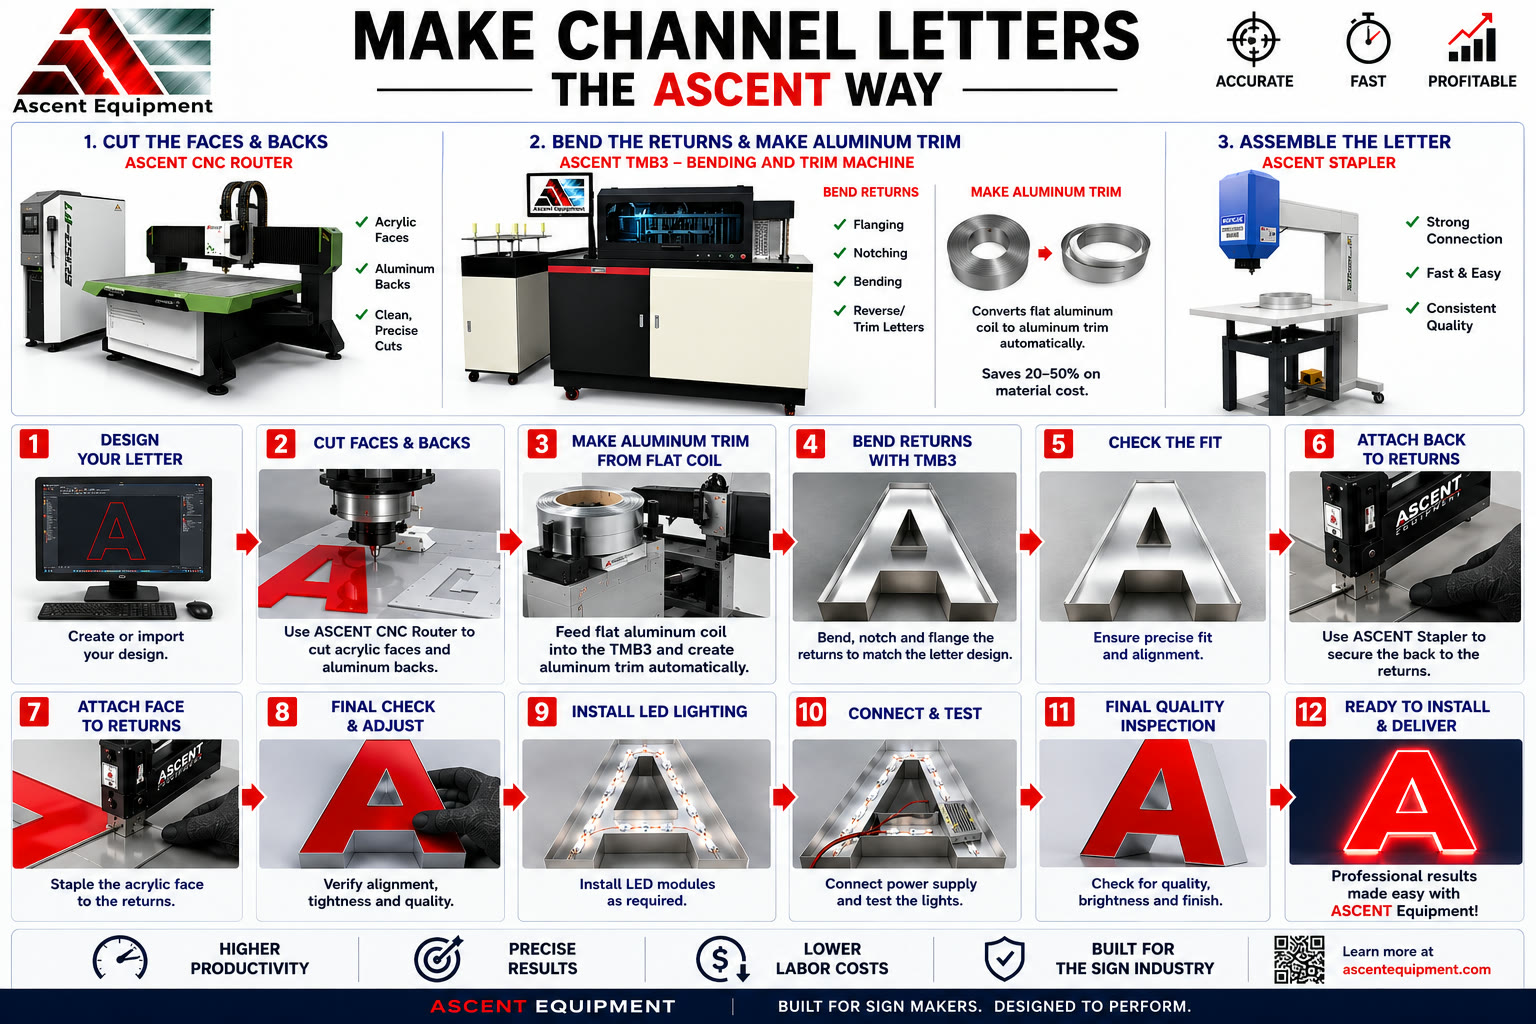
The Three Machines
| Step | Machine | Operation |
|---|---|---|
| Cut faces & backs | Ascent CNC Router | Acrylic faces, aluminum backs — clean, precise cuts |
| Bend returns & make trim | Ascent TMB-3 | Flanging, notching, bending, plus aluminum trim from flat coil |
| Assemble | Ascent Stapler | Secure back to returns, face to returns |
The Ascent TMB-3 is where this workflow differs from a standard bender setup. Instead of ordering pre-formed plastic trim cap, the Ascent TMB-3 feeds flat aluminum coil and forms the trim profile on the spot — at roughly 20–50% less material cost than buying plastic trim.
Step 1 — Design Your Letter
Create or import your letter design into the software. The design file drives the CNC Router for cutting and the Ascent TMB-3 for bending — the same artwork controls both machines, so dimensional accuracy carries through from design to finished letter without re-entry or manual measurement.
Step 2 — Cut the Faces and Backs
Load acrylic sheet for the face and aluminum sheet for the back onto the Ascent CNC Router. The router cuts both parts to the exact letter shape.
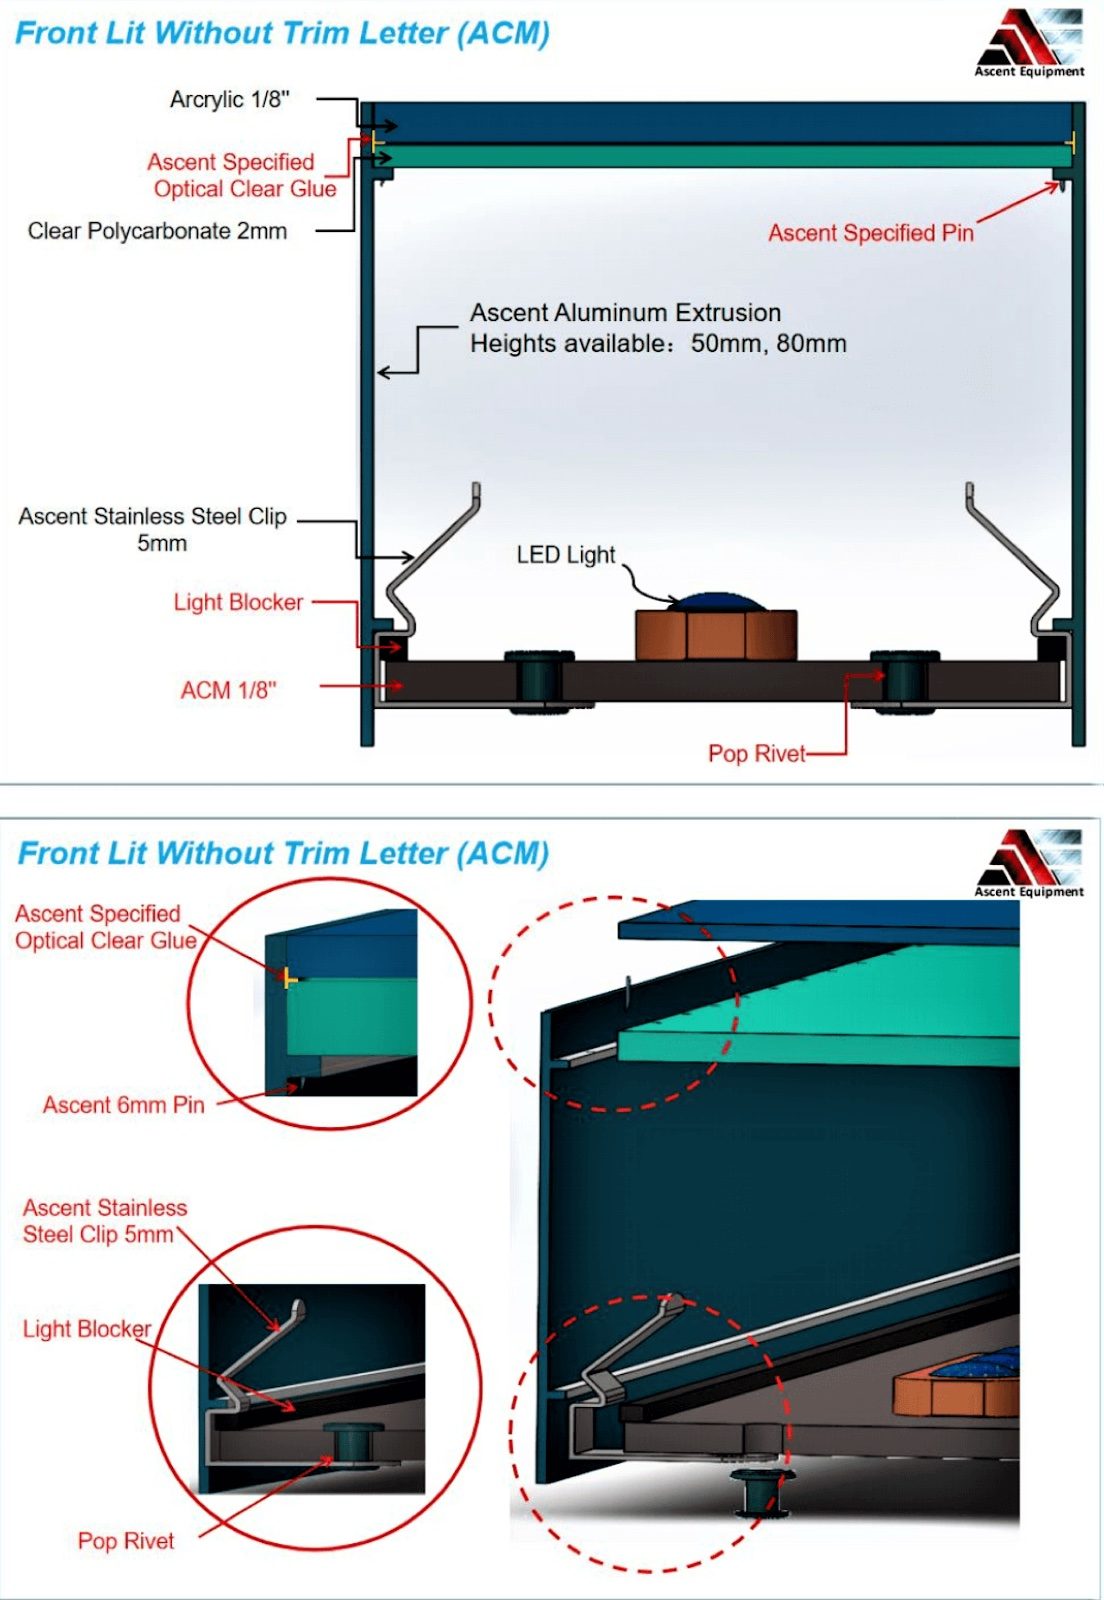
- Acrylic face: cut to the letter profile for front illumination
- Aluminum back: cut to the return height and letter outline
CNC cutting produces consistent, clean edges that fit precisely against the Ascent TMB-3-bent returns. There's no hand-routing variation to compensate for at assembly.
Step 3 — Make Aluminum Trim from Flat Coil
This is the step that sets the Ascent TMB-3 workflow apart.
Feed flat aluminum coil into the Ascent TMB-3. The machine profiles the coil and forms it into aluminum trim cap automatically — no pre-cut lengths, no purchased plastic profile, no waste from ordering the wrong size.
Why aluminum trim instead of plastic?
- Aluminum trim costs 20–50% less per foot than plastic trim cap
- The material is formed on demand, so you only produce what the job requires
- Aluminum trim has a cleaner, more finished appearance and is more durable outdoors
The Ascent TMB-3 produces trim in the exact length and profile needed for the letter — the same machine that will bend the return in the next step.
Step 4 — Bend the Returns with the Ascent TMB-3
With trim production complete, the Ascent TMB-3 shifts to bending the aluminum return. The machine handles:
- Flanging — creates the lip that faces and backs attach to
- Notching — relief cuts at corners for clean bends without cracking
- Bending — follows the letter profile to match the design file
- Reverse/trim letter capability — handles the profiles required for trim-cap and reverse-channel styles
The Ascent TMB-3 reads the letter geometry and executes the full sequence automatically. One operator, one machine, two operations — trim and return — without retooling.
Step 5 — Check the Fit
Dry-fit the bent return and trim against the face and back before assembly:
- Returns follow the letter contour cleanly
- Corner notches are sharp with no material cracking
- Flanges are even in height across the full perimeter
- Face seats flush against the return flange
- Trim profile seats cleanly against the face edge
Catching any fit issue here takes seconds. Catching it after stapling takes much longer.
Step 6 — Attach the Back to the Returns
Using the Ascent Stapler, drive fasteners along the flange to secure the aluminum back to the return. The pneumatic stapler delivers consistent drive depth and uniform spacing across every letter — no variable hand pressure, no drilling, no pop rivets.
Step 7 — Attach the Face to the Returns
Fit the acrylic face onto the return flange and staple it in place. The stapler's controlled force protects the acrylic from cracking while ensuring a tight, gap-free seam.
With aluminum trim-cap letters, the trim seats over the face-to-return joint and is secured at this stage for a clean finished edge on all sides.
Step 8 — Final Check and Adjust
With the letter assembled:
- All seams tight with no visible gaps
- Letter is square — face flush with returns on all sides
- All fasteners secure
- Trim cap seated cleanly against the face edge
- Corner joints clean and even
Make any minor adjustments before the LED installation step, which locks the interior configuration in place.
Step 9 — Install LED Lighting
Install LED modules inside the letter. Route wiring to the power supply exit point and secure modules evenly across the back panel. Even module spacing at this step determines how uniform the illumination looks from the street.
Step 10 — Connect and Test
Connect the power supply and test the LED output before sealing:
- Even brightness across the full face
- No dark spots, hot spots, or flickering
- Correct color temperature
- All connections secure and insulated
Step 11 — Final Quality Inspection
Full inspection with the letter lit:
- Brightness and uniformity from the viewing angle
- Seam quality — face, back, and trim all seated cleanly
- Back panel and trim security
- Wiring protected at exit point
- No surface scratches or tooling marks on the acrylic
Step 12 — Ready to Install and Deliver
The letter goes to site ready to mount. Clean seams, consistent trim, uniform illumination — the kind of result that comes from running each step through a machine built specifically for it.
The Ascent TMB-3 Advantage in Numbers
The productivity gain over hand methods is substantial:
- Hand bending: 30–45 minutes per letter (experienced fabricator)
- Ascent TMB-3 workflow: 3–4 minutes of machine time per letter
- Trim cost: 20–50% less per foot versus plastic trim cap
- Material waste: near zero — trim is formed to length on demand
On a 20-letter job with trim-cap letters, the material savings alone often cover a meaningful portion of the machine's cost over time — before counting the labor savings.
The Three Machines — Quick Reference
Ascent TMB-3 — Bends the return and forms aluminum trim from flat coil in the same workflow. Handles flanging, notching, bending, and reverse/trim letter profiles.
Ascent Stapler — Pneumatic stapler purpose-built for channel letter assembly. Consistent drive depth protects acrylic faces and produces tight, professional seams.
Questions about whether the Ascent TMB-3 is the right fit for your shop? Contact us — we can walk through the numbers for your current production mix.