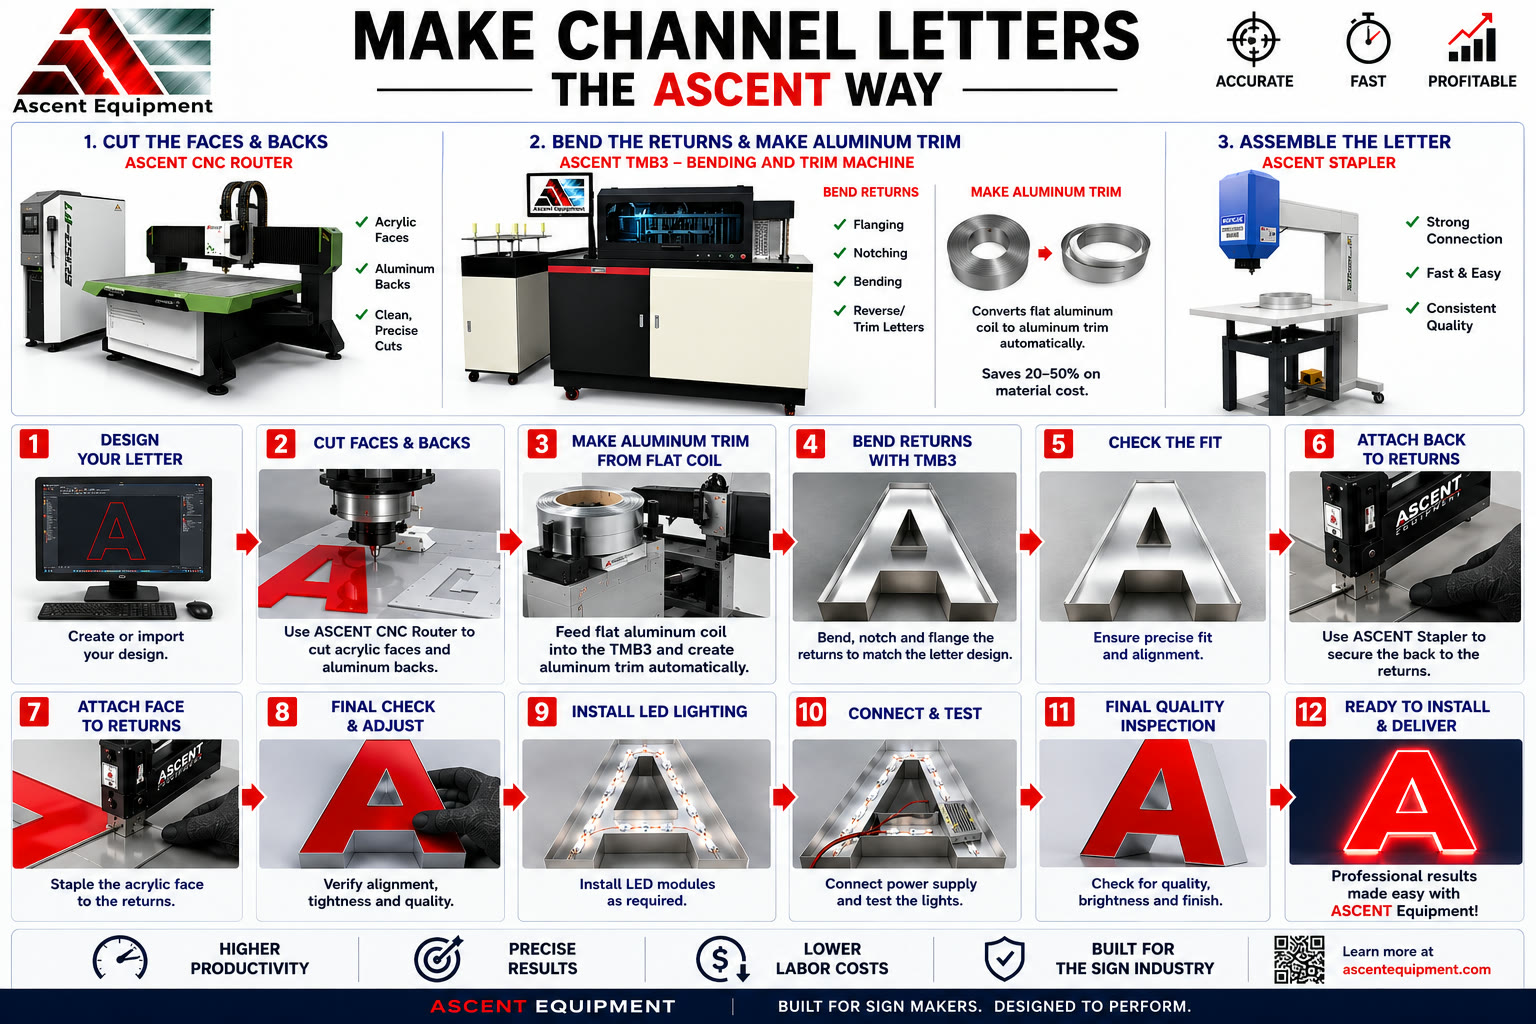

Building a channel letter has always required three fundamental operations: cutting the faces and backs, bending the returns, and assembling the finished letter. What changes when you add Ascent equipment to each step is how long those operations take, how consistent the results are, and how much of that time actually requires a skilled operator.
This walkthrough covers the complete process using three Ascent machines — the CNC Router, the Ascent EDGE-3 bending machine, and the Ascent Stapler — from a blank design file to a letter that's ready to install.
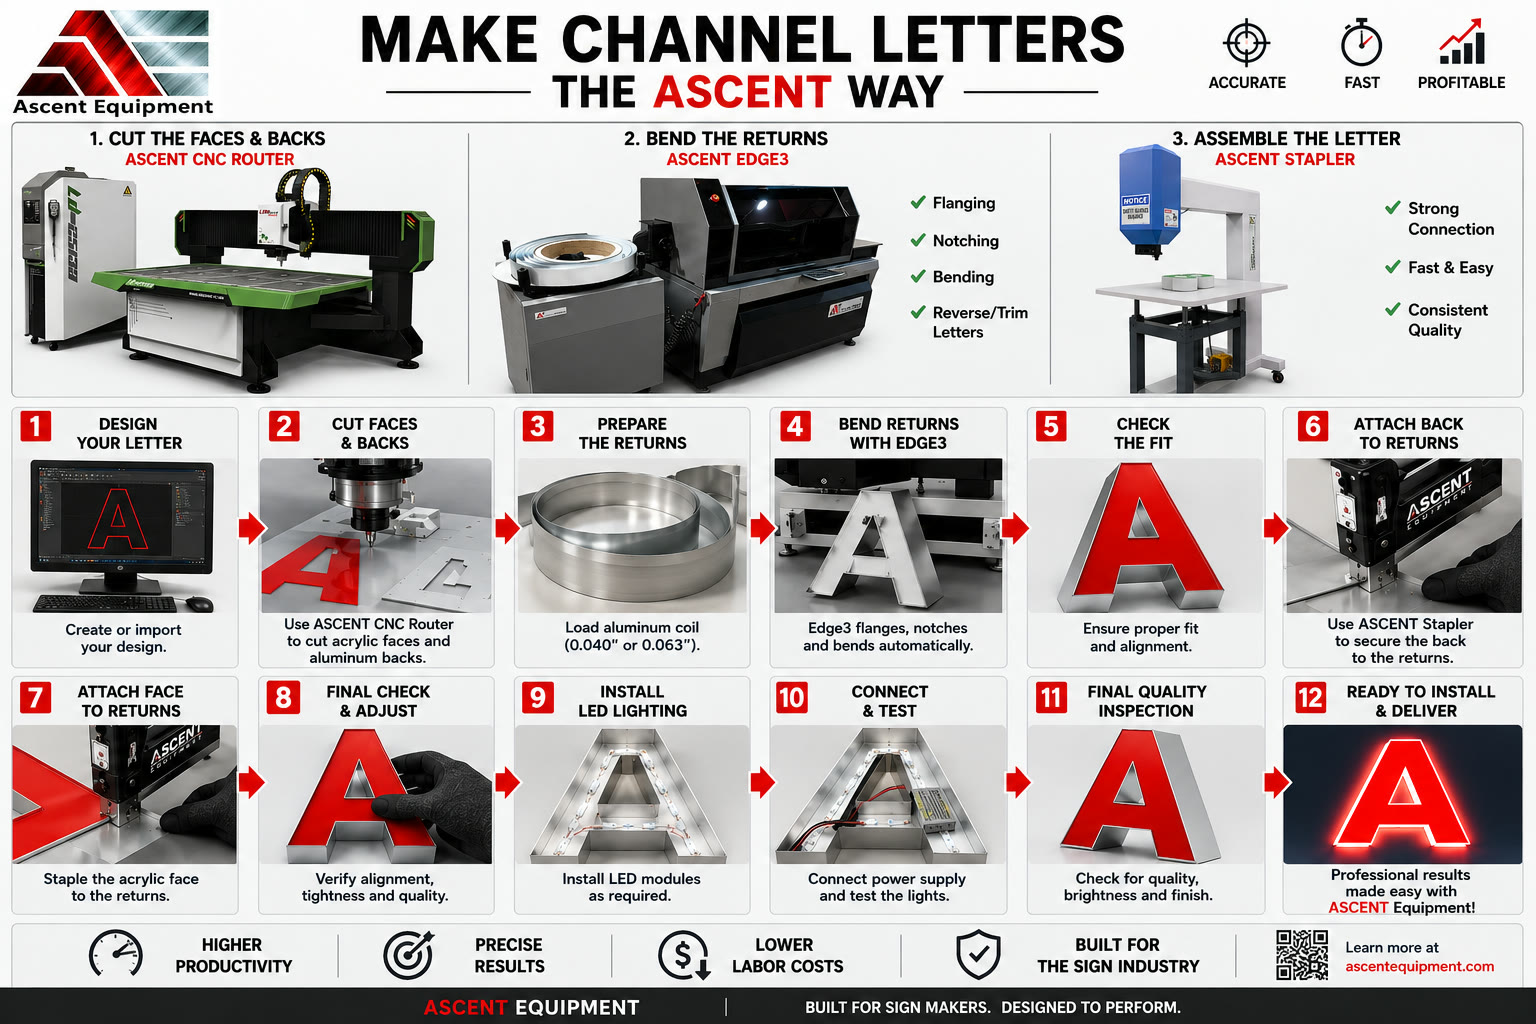
The Three Machines
Before walking through the steps, here's how the workflow divides across the three machines:
| Step | Machine | Operation |
|---|---|---|
| Cut faces & backs | Ascent CNC Router | Acrylic faces, aluminum backs |
| Bend the returns | Ascent EDGE-3 | Flanging, notching, bending, reverse/trim letters |
| Assemble | Ascent Stapler | Secure back to returns, face to returns |
Step 1 — Design Your Letter
Create or import your letter design into the CNC software. The design file drives both the router (for cutting) and the Ascent EDGE-3 (for bending) — so accurate artwork at this stage means accurate results at every step that follows.
Most sign shops import artwork from their design software directly. The CNC router accepts standard vector formats; the Ascent EDGE-3 reads the same design to calculate the exact bend sequence for the return profile.
Step 2 — Cut the Faces and Backs
Load acrylic sheet for the face and aluminum sheet for the back onto the Ascent CNC Router table. The router cuts both parts to the exact letter shape from the design file.
- Acrylic face: cut to the letter profile, including any internal cutouts for the style (front-lit, reverse halo, etc.)
- Aluminum back: cut to match the return height and letter shape
CNC cutting eliminates the hand-routing variation that causes fitting problems later. Every face and back comes off the table to the same dimension, every time.
Step 3 — Prepare the Returns
Load aluminum coil into the Ascent EDGE-3. Standard material is 0.040" aluminum for most channel letters; heavier 0.063" is used for larger letters or where additional rigidity is required.
The coil feeds automatically — no manual straightening or pre-cutting needed before bending begins.
Step 4 — Bend the Returns with the Ascent EDGE-3
The Ascent EDGE-3 is a 6-axis CNC bending machine that handles:
- Flanging — creates the lip that the face and back attach to
- Notching — cuts relief notches at corners so the return bends cleanly without cracking or wrinkling
- Bending — follows the letter profile with precise servo-controlled motion
- Reverse/trim letter capability — handles the tighter radii and specialty profiles required for reverse-channel and trim-cap letters
The machine reads the design file and executes the full bend sequence automatically. An operator loads the coil and monitors — the Ascent EDGE-3 does the forming.
Step 5 — Check the Fit
Before assembly, dry-fit the return against the face and back to verify alignment. Check that:
- Returns follow the letter contour accurately
- Corner notches are clean with no cracking
- Flanges are consistent in height
- The face sits flush against the return flange
Any adjustment is faster at this stage than after assembly.
Step 6 — Attach the Back to the Returns
Using the Ascent Stapler, secure the aluminum back to the return flange. The pneumatic stapler drives fasteners consistently along the flange — no manual drilling, no pop rivets, no variable hand pressure.
The result is a strong, uniform connection along the full perimeter of the back.
Step 7 — Attach the Face to the Returns
Fit the acrylic face onto the return flange and staple it in place using the same Ascent Stapler. The stapler's consistent drive depth protects the acrylic from cracking while ensuring a tight, professional seam.
Why the Ascent Stapler matters here: hand stapling or riveting introduces inconsistent force that can crack acrylic faces or leave gaps in the seam. The pneumatic stapler eliminates both problems.
Step 8 — Final Check and Adjust
With the letter assembled, verify:
- All seams are tight with no visible gaps
- The letter is square — face is flush with the returns on all sides
- Flanges are secure — no loose fasteners
- Corner joints are clean
Minor alignment adjustments are made at this step before LED installation locks the configuration in place.
Step 9 — Install LED Lighting
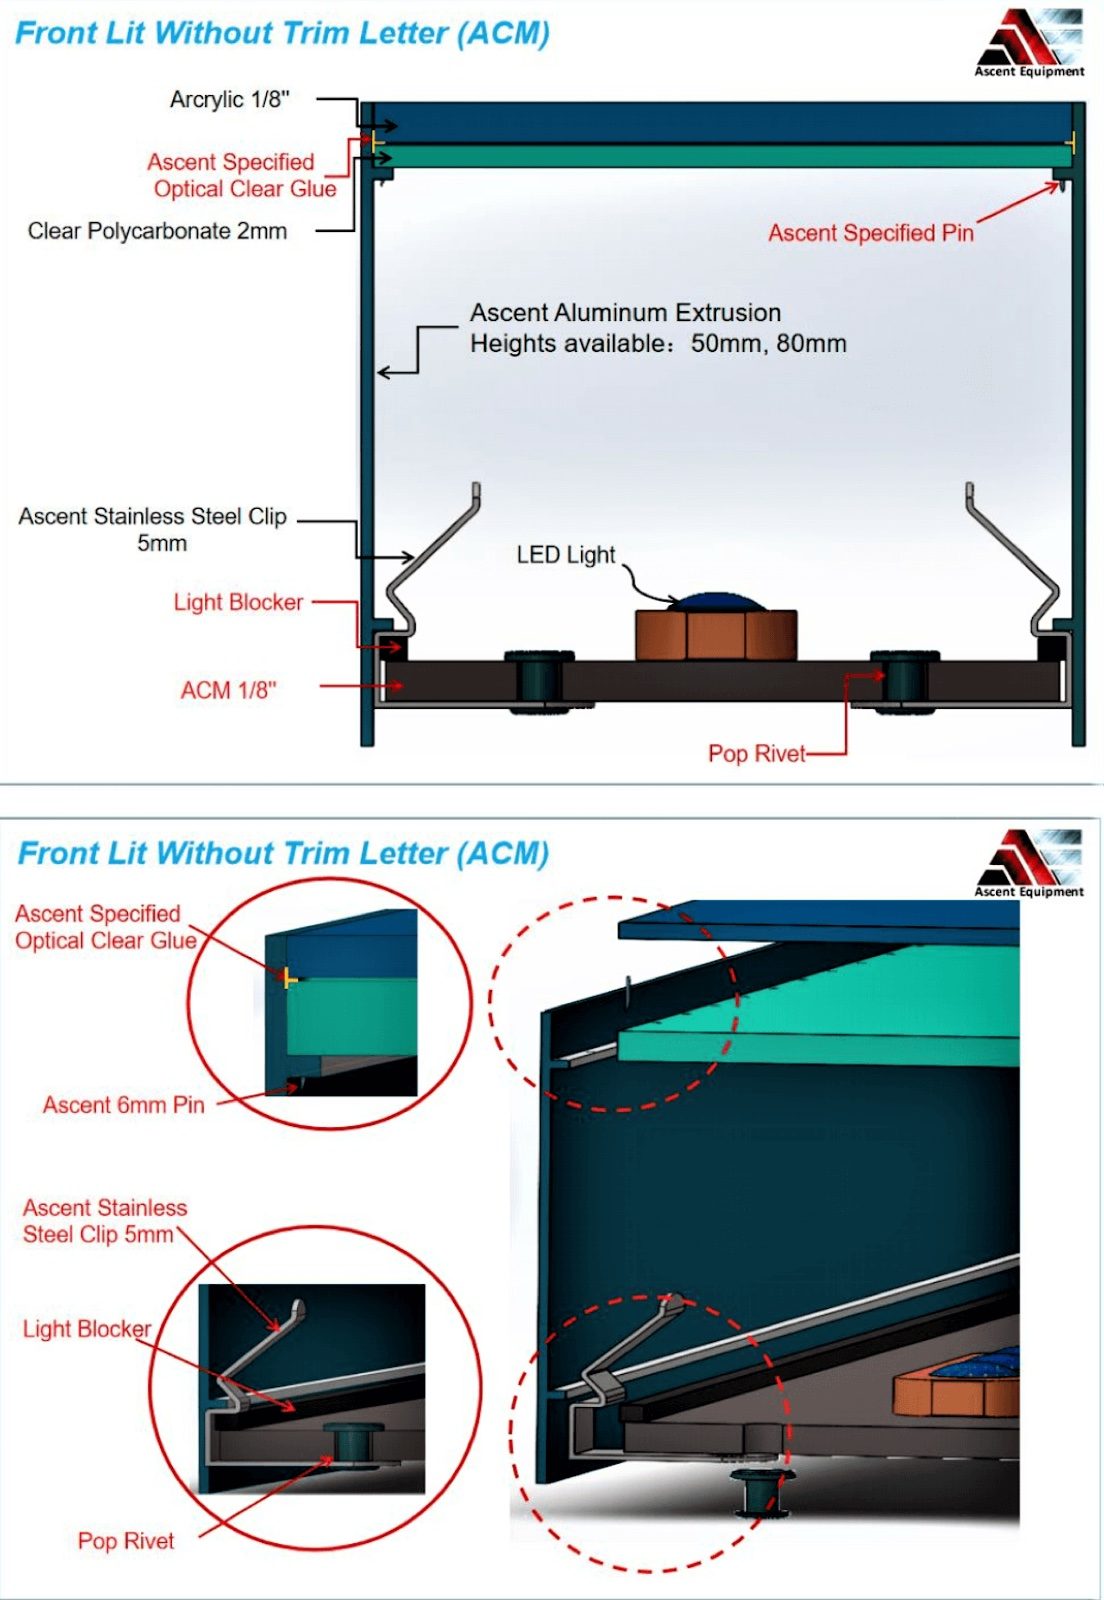
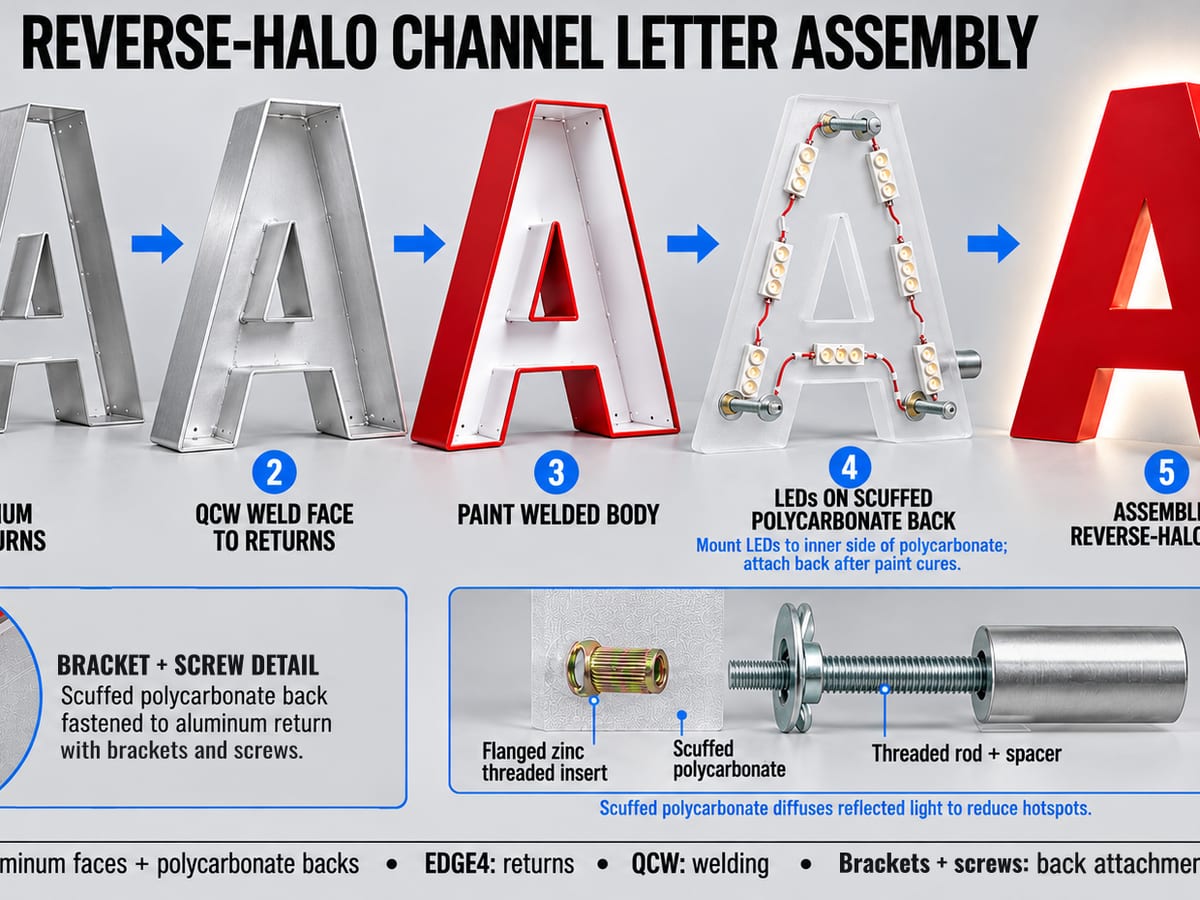
Install LED modules inside the letter, following the manufacturer's wiring layout for the letter type (front-lit, reverse halo, etc.). Route wiring to the exit point and secure the modules to the back panel.
Even lighting coverage depends on consistent module spacing — the time saved on bending and assembly leaves more time for careful LED placement.
Step 10 — Connect and Test
Connect the power supply and test the LED output before sealing. Check for:
- Even brightness across the full letter face
- No dark spots or hot spots
- Correct color temperature
- Secure wiring connections with no exposed conductors
Testing before delivery prevents call-backs.
Step 11 — Final Quality Inspection
With the letter fully assembled and lit, do a complete quality inspection:
- Brightness and uniformity from the viewing angle
- Seam quality on all edges
- Back panel security
- Wiring exit point sealed or protected
- Overall finish — no scratches, tooling marks, or smudges on the acrylic face
Step 12 — Ready to Install and Deliver
The letter ships to the installation site ready to mount. Clean wiring, consistent quality, and a tight assembly means the installer gets a letter that goes up without surprises.
What Changes When You Use Ascent Equipment
Hand-building a channel letter — hand-routing faces, hand-bending returns, hand-riveting assembly — takes an experienced fabricator 30 to 45 minutes per letter. With the Ascent CNC Router, Ascent EDGE-3, and Stapler, that drops to 3 to 4 minutes of machine time per letter, with far less skilled-operator involvement at each step.
That's not a small improvement. On a 15-letter job, the difference is roughly a full day of production versus a morning.
The consistency gain matters too. CNC-cut faces match CNC-bent returns because both come from the same design file. The stapler applies uniform fastening pressure across every letter. The result is a uniform product that's faster to inspect and easier to stand behind.
The Three Machines — Quick Reference
Ascent EDGE-3 — 6-axis CNC channel letter bender. Handles traditional trim cap, flanging, notching, reverse channel, and 0.080" aluminum. Integrated output cutter.
Ascent Stapler — Pneumatic stapler purpose-built for channel letter assembly. Fast, consistent, safe for acrylic faces.
Questions about the right machine combination for your shop? Contact us — we can walk you through what the workflow looks like for your current production volume.